
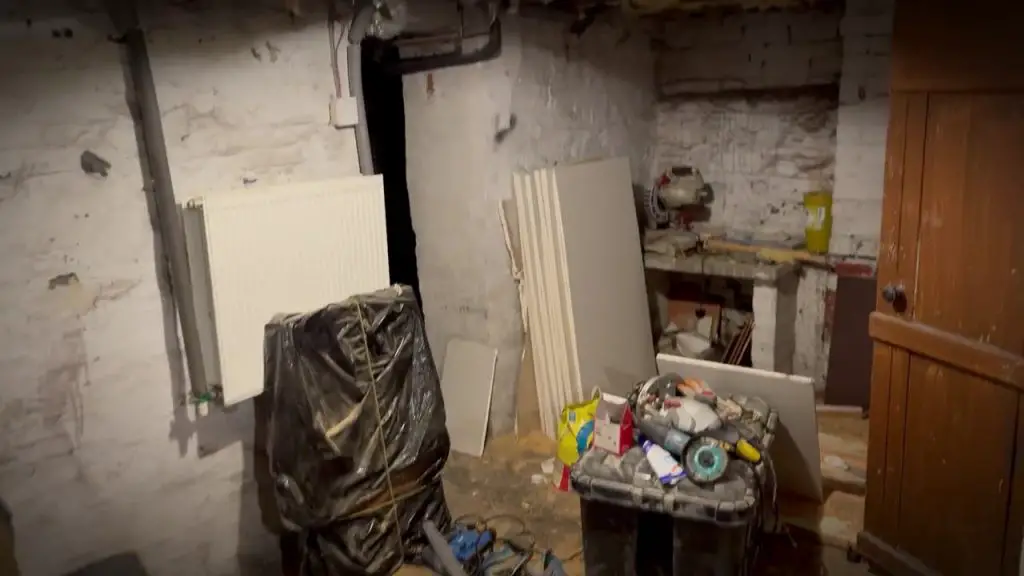
If you’ve ever dreamed of creating the ultimate gaming setup, you’re in the right place. For me, the journey starts in an old, damp cellar, complete with a coal shoot. This is Part One of my project to transform a neglected basement into the perfect gaming space. Let’s dive in!
The Challenge
This isn’t just about tidying up a basement—it’s about creating a comfortable, functional, and stylish gaming room. The first step? Clearing out the clutter, assessing the space, and planning the layout.
What I’m Working With
- A room that I’ve previously damp-proofed and fitted with electric underfloor heating.
- A coal shoot that needs blocking off.
- Two windows and a door (why they’re here is a mystery, but it’s cool).
- Some very dodgy electrics!
Step 1: Clearing the Space
Every great project starts with a solid clean-up. My cellar had become a dumping ground for random items over the years. Here’s how I tackled it:
- Organizing: Bought affordable shelves (£20 each from B&Q) to store items neatly and keep them off the damp floor.
- Sweeping and Clearing: Made space to see what I was working with.
- Assessing the Floor: Uneven in places, so self-leveling will be necessary later.
Pro Tip: Shelving is a lifesaver—it creates order and keeps items away from moisture.

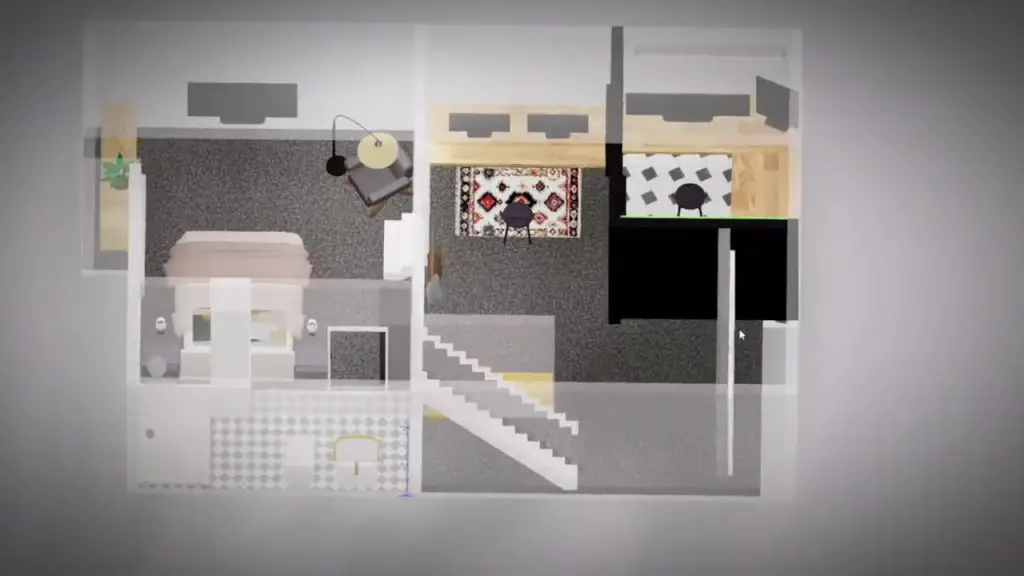
Planning the Layout
I used free online software to create rough floor plans (not CAD-perfect but good enough for visualization). The plan includes:
- A Guest Bedroom with Ensuite: Located in the larger room.
- The Gaming Room: In the coal shoot area, with a stylish L-shaped desk, green screen, and additional workspace.
- Storage: Under the stairs, keeping everything tidy and accessible.
Step 2: Prepping the Coal Shoot
Blocking the Walls
To start, I used weed control fabric. This isn’t for weeds here, but to create a clean, black surface that hides the wall’s imperfections and acts as a base for future wood paneling.
- Cost-Effective Idea: DIY wood paneling using timber and fabric instead of expensive pre-made panels (£80 per panel? No, thanks).
- Tools for the Job:
- Brad nails and adhesive spray to secure the fabric.
- A Makita drill and a trusty Stanley knife for precision.
Step 3: Installing Lighting
Why Lighting Matters
The cellar felt dark and uninspiring. Adding proper lighting was essential to make it functional and inviting.
The Setup
- LED Dimmable Downlights: IP65 fire-rated and damp-proof, perfect for a basement.
- Dimmable Switch: For controlling brightness based on the mood.
- Placement: Six downlights, evenly spaced with the help of a laser level.
Wiring Tips
- Used push-fit connectors for easy installation.
- Ran cables through joists, ensuring everything was tidy and future-proofed.
- Avoided buzzing LED light dimmer switch by upgrading to a trailing edge dimmer switch, which works better with LED lights and doesn’t buzz, who knew there were 2 types of dimmer switches?!
Current Progress
- Lighting Installed: The room is now well-lit and feels more like a usable space.
- Walls Covered: Fabric in place, ready for wood paneling.
- Clutter Organized: The cellar is clean and prepped for the next steps.
Challenges Encountered
- Damp Issues: The tanking has held up, but there are cold spots on the walls.
- The Coal Shoot Window: Should I block it for more wall space or leave it open for extra light? Let me know in the comments!
- Plasterboarding: Heavy and time-consuming, but necessary.
What’s Next?
In Part Two, I’ll:
- Build stud frames for the walls.
- Address any remaining damp issues.
- Start Insulating, lots of it!
Your Input Matters
If you’ve done a similar project or have advice on:
- Damp-proofing.
- Blocking off a coal shoot.
- Maximizing small spaces.
Drop your tips in the comments below! I’d love to incorporate your ideas into the next phase of the project.
Tools I’ve Used
Here’s the gear making this transformation possible:
Plug Tester: Buy now
Chalk Hole Marker: Check it out on Amazon
Chalk Line Set: View it here
Laser Level Cube: Shop now
Makita Drill: Find it on Amazon
Makita Impact Wrench: See it here
Wire Cutter/Splitter: Grab one here
Electricity Pen Tester: Check it out
This is just the beginning of what I hope will be the ultimate gaming room transformation. Stay tuned for Part Two and beyond.