
Welcome back to Project Cellar, where I’m turning an Edwardian coal shoot into my ultimate gaming room. If you missed Part 1, we cleared out the cellar, installed dimmable LED lights, and mapped out the layout. Now, in Part 2, we’re making serious progress: building stud frames, wiring for power, and preparing for insulation.
Let’s dive into this week’s updates!
What’s New This Week?
- Building the Wall Frames: Creating the structure for plasterboard and insulation.
- Wiring Power Sockets: Installing a fused spur and double sockets for future tech and computer related things!
- Managing Damp: Using waterproof sheeting and strategic placement to keep moisture at bay.
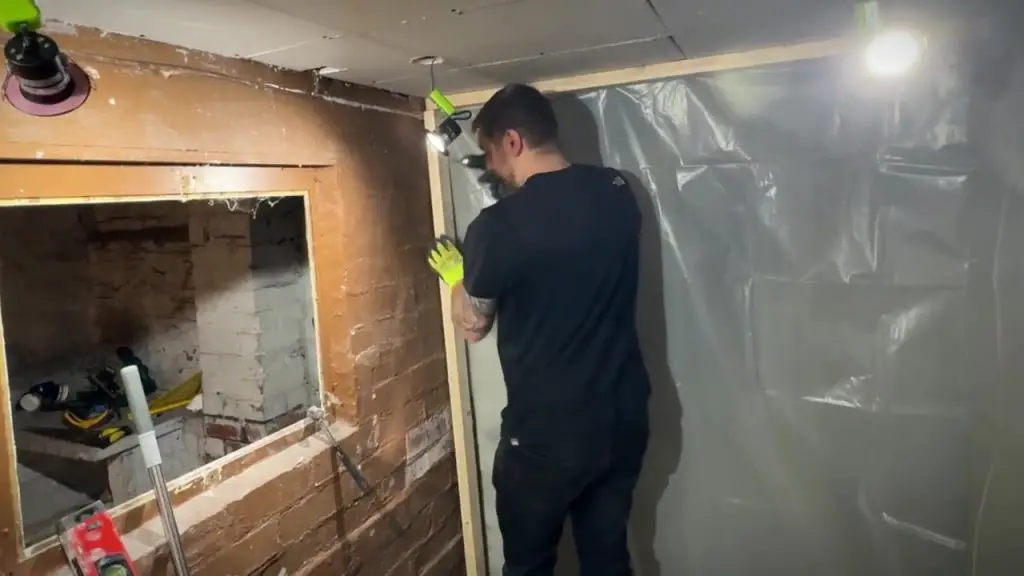
Step 1: Building the Wall Frames
The Plan
The goal was to create a sturdy frame for plasterboard while leaving enough space for insulation. Since this is a small room, I opted for slightly smaller timber to save space and costs. The frame was about 1 foot away from the tanked walls, to avoid the back of the walls touching the timber and creating air pockets all the way around for the air to flow naturally, this lost me some space but it will be worth it in the end. I also left space in these ‘Air Pockets’ behind the wall for the ceiling joists to still receive air to avoid them rotting.
How It Went
- Laser Leveling: Used a laser level to outline the placement of the first wall. Precision is key here!
- Cutting and Fitting: Measured the timber to size, ensuring the studs were spaced 400mm apart to fit the insulation, I used Rockwool insulation (Until I ran out) – This is a much better form of insulation to work with as it doesn’t send fiber glass flying everywhere!.
- Securing the Frame: Drilled into the floor and walls to anchor the frame securely, for the floor I used concrete locking nuts to make sure this wall is SOLID.
Pro Tip: Don’t forget to include air gaps to allow the walls to breathe, preventing trapped moisture from causing issues.
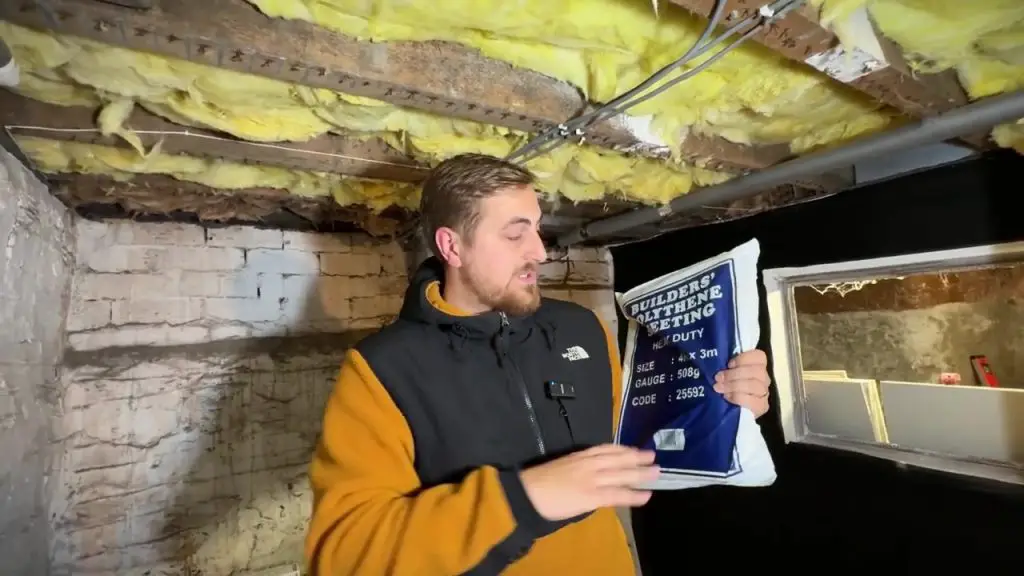
Step 2: Managing Damp with Polyethylene Sheets (Think Dexter)
Damp was a big concern in this project. While traditional methods like tanking hadn’t worked as well as expected, I opted for a layer of polyethylene sheeting behind the insulation.
Why Polyethylene?
- Acts as a vapor barrier to keep moisture away from the insulation and timber.
- Affordable and easy to install—just £7 for a 4x3m sheet.
How I Installed It
- Draped the sheeting over the walls and secured it with staples.
- Made sure it overlapped with the floor to create a continuous barrier.
- Left gaps near the joists to allow airflow.
- This was now the backing for my walls.
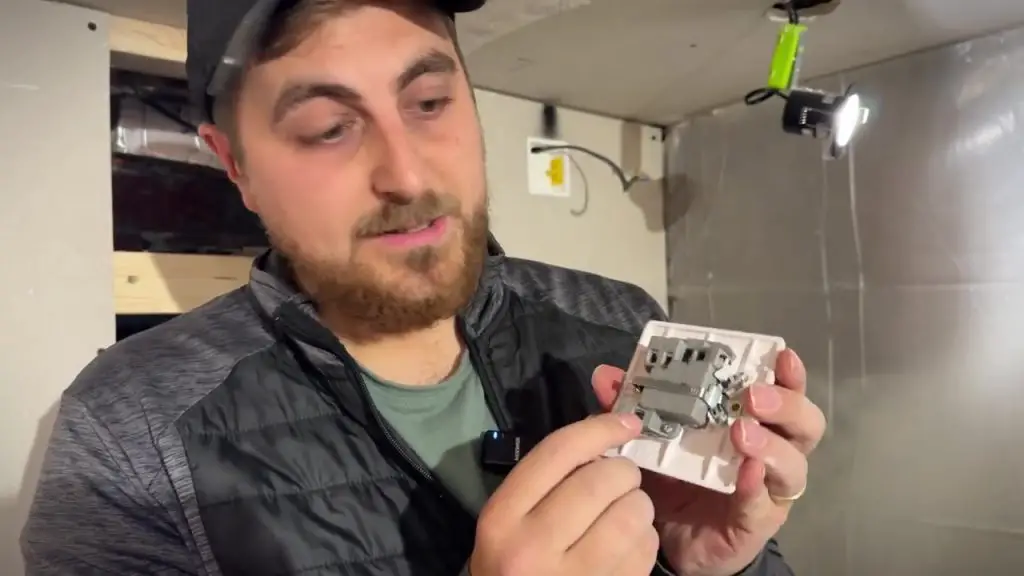
Step 3: Wiring for Power
The Plan
The gaming room needs plenty of power, so I installed a fused spur and wired 2 double sockets. The fuse provides added protection and allows me to expand the circuit safely, also at night when I’m finished in the room, I can turn everything off.
How I Did It
- Fitting the Fused Spur: Wired a 13A fused spur to an existing ring main. This acts like a mini fuse box for the room.
- Routing the Cables: Threaded wires through the waterproof sheeting and framed walls.
- Testing: Used a socket tester to ensure proper wiring and safety.
Pro Tip: Position sockets higher off the ground in basements to avoid potential moisture issues.
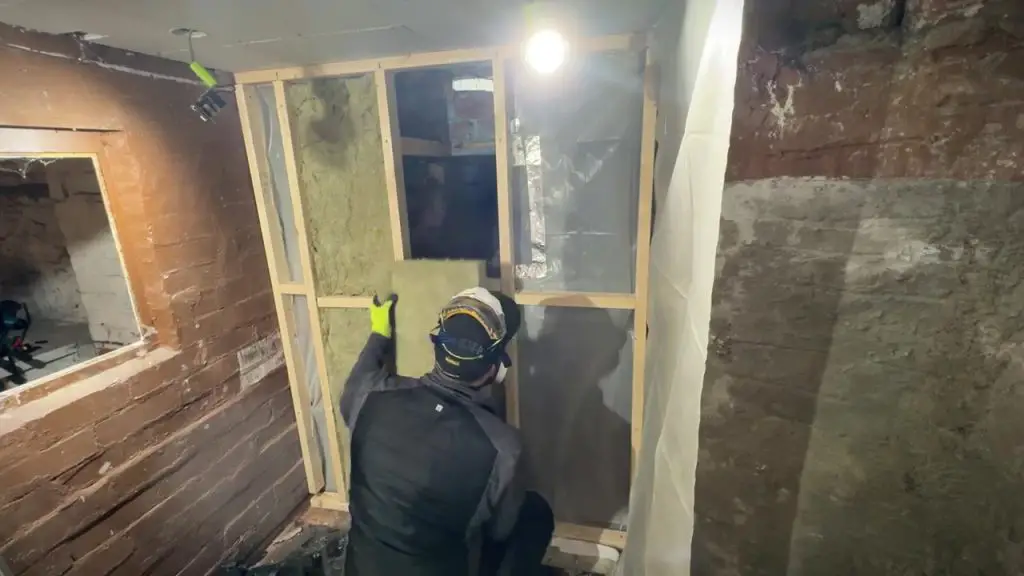
Step 4: Insulation and Plasterboarding
With the frame in place, I began adding insulation. For this project, I used rock wool insulation, which is easy to cut and provides excellent thermal and soundproofing properties.
- Cutting to Size: Rock wool panels fit perfectly between the 400mm stud spacing.
- Fitting the Insulation: Slotted the panels into place, ensuring no gaps.
- Sealing with Plasterboard: Secured plasterboard over the frame, leaving cutouts for sockets and windows.
Step 5: Addressing the Coal Shoot Window
The coal shoot window posed an interesting challenge. Do I block it off completely or leave it open for natural light? For now, I’ve framed it out to prepare for adding a glass block or vent to balance aesthetics and functionality.

Challenges Faced
- Moist Walls: Drilling into damp walls required extra care to ensure a secure fit, some holes were easier to drill than others, depending on how moist the walls were.
- Plasterboarding Alone: Lifting and securing plasterboard overhead solo was a workout!
- Finding the Right Fuse: Swapping a buzzing dimmer switch for a trailing-edge model fixed compatibility issues with the LED lights.
Next Steps
In Part 3, I’ll focus on:
- Completing the plasterboard and skim coating (Not looking forward to this!).
- Designing the window and extractor fan placement.
- Starting on decorative finishes, like painting and panelling.
Tools Used
Here’s the gear that made this week’s progress possible:
- Laser Level Cube: Shop here
- Makita Drill: Get it now
- Electric Staple Gun: Check it out
- Polyethylene Sheeting: Affordable from most hardware stores.
- Rock Wool Insulation: Find it here
- Fused Spur Unit: Buy now
- Socket Tester: Shop here
Stay Tuned!
If you enjoyed this update and want to see the progress as it happens, make sure to like, subscribeto my Youtube, I’ll be putting update videos out every two weeks or so until this is finished! If you have any tips or ideas for dealing with damp basements or optimising small spaces? Drop them in the comments or join my Discord for a chat.
Catch you in Part 3! 🚀