Looking to create a professional-quality stream intro quickly and on a budget? Using CapCut Desktop, you can design a personalized intro in under 20 minutes! Whether you’re a Twitch streamer, YouTuber, or just starting out, this guide will show you how to craft an engaging intro with music, transitions, and effects—all without breaking the bank.
Why CapCut?
CapCut stands out for its ease of use, affordability, and powerful features like AI beat detection and built-in effects. As a designer with experience in Adobe Premiere, After Effects, and DaVinci Resolve, I’ve found CapCut to be an efficient alternative, especially for streamers and content creators.
Step-by-Step Guide to Making a Stream Intro
1. Choose the Right Music
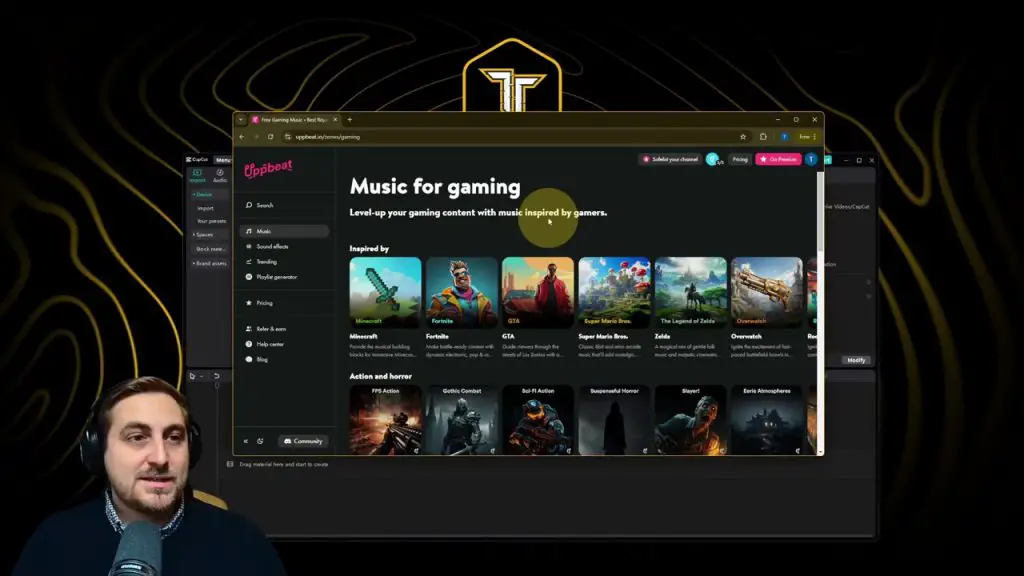
Your intro sets the tone for your stream, so pick a track that matches your style or genre. For example:
- Upbeat Tracks: Great for gaming and also vlogs, it offers multiple categories too, so if you’re an FPS Streamer, you can chose music tailored to that category.
- Cinematic Music: Perfect for dramatic or story-driven content.
Recommended Site: Upbeat
- Free with attribution or premium for £6.99/month.
- Use the site’s beat visualisation to select tracks with prominent drops and transitions.
2. Add Music to CapCut
- Import the Track:
- Drag the downloaded music file into CapCut.
- Place it on the Audio Track in the timeline.
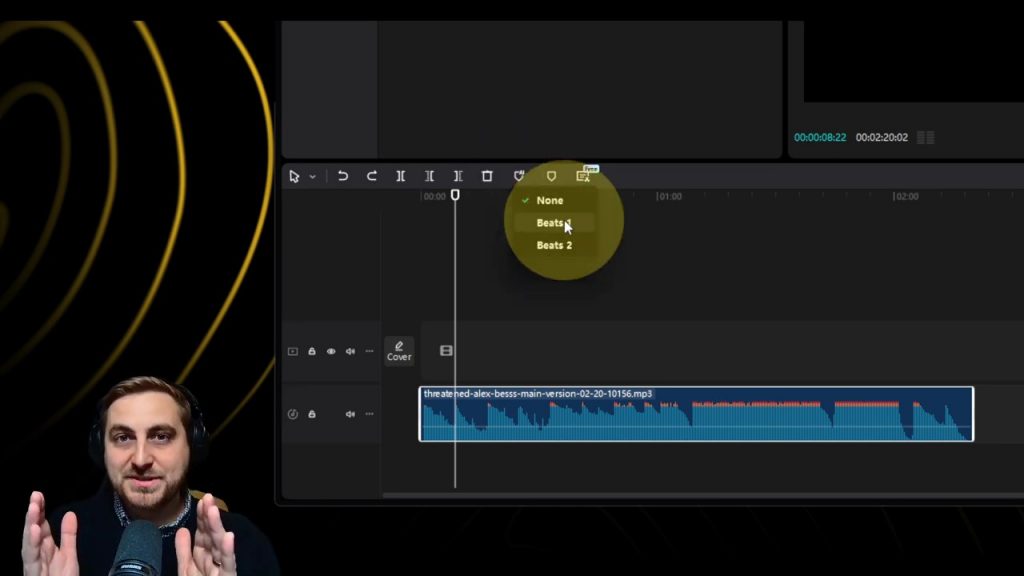
- Mark Beats Using AI:
- Select the music track.
- Click AI Beat Detection > Beats 1.
- Markers will appear on the timeline at key moments, helping you align visuals with the music.
Shortcut: Use Ctrl + Z to undo if you accidentally place beats manually.
3. Import and Arrange Footage
- Import Your Clips:
- Drag all your video files into CapCut.
- Short, dynamic clips work best for intros.
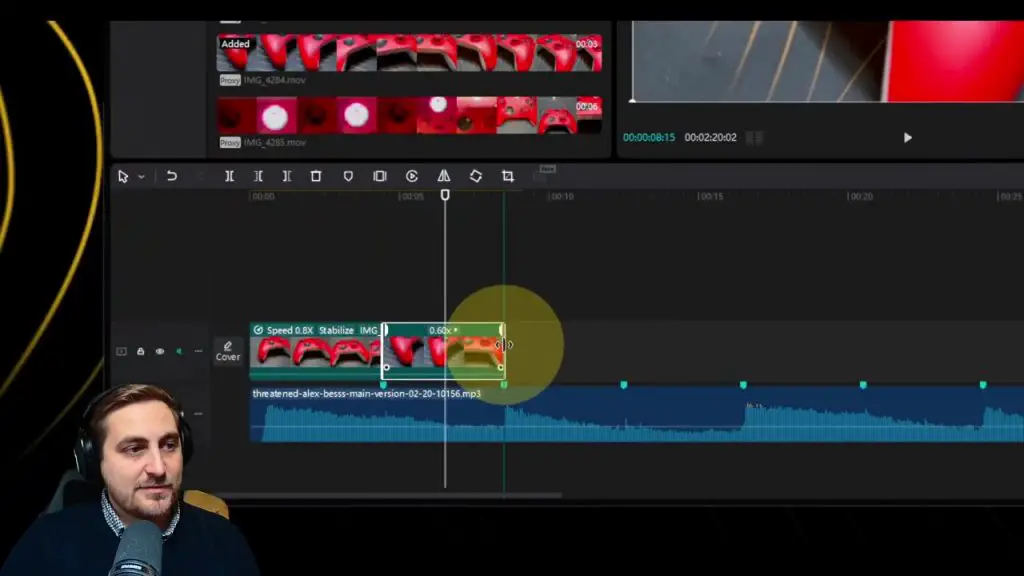
- Add Clips to Timeline:
- Place your footage on the Video Track.
- Match each clip to a beat marker by trimming or extending the duration.
Shortcuts:
- Ctrl + K: Split a clip at the playhead position.
- Ctrl + Shift + D: Add default transitions between clips.
- Adjust Speed and Stabilization:
- Use the Speed tool for dynamic effects.
- Apply Stabilization (Pro feature) to smooth shaky footage.
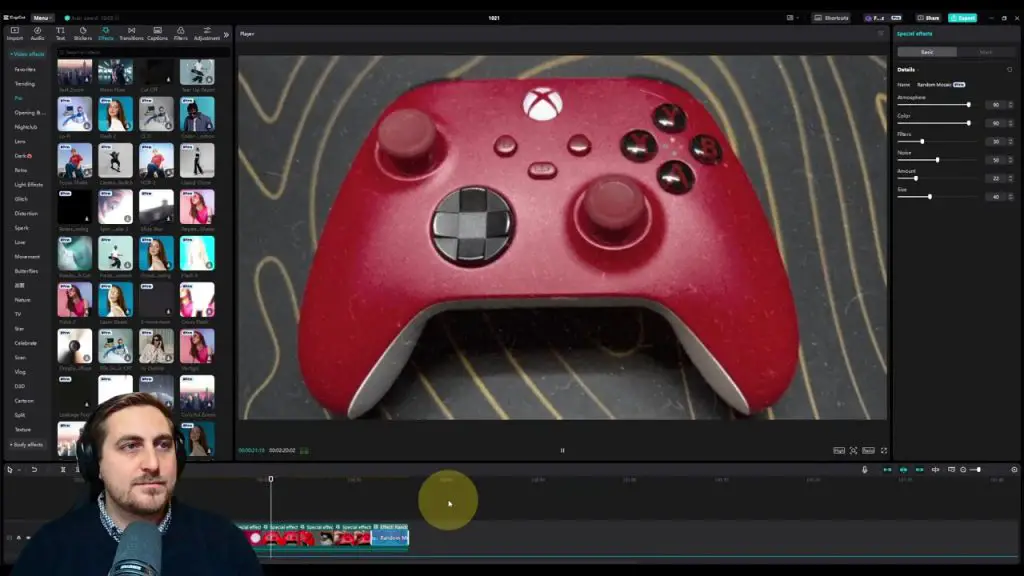
4. Add Effects
CapCut has an extensive library of effects to enhance your visuals.
- Apply Video Effects:
- Go to the Effects Tab.
- Browse categories like Trending or Pro Effects.
- Drag effects onto individual clips or overlay them on the timeline.
- Customize Effects:
- Adjust intensity, speed, or duration to match your style.
Shortcut: Use Alt + Drag to copy an effect to another clip.
5. Add Transitions
Transitions help merge clips seamlessly.
- Select Transition Effects:
- Click the Transitions Tab.
- Preview options like Zoom, Ink Splatter, or Film Fade.
- Apply Transitions:
- Drag transitions to the gap between clips.
- Adjust the duration by dragging the edges of the transition.
Shortcut: Use Shift + Mouse Wheel to zoom in and out of the timeline for precise placement.
6. Adjust Colors and Filters
CapCut’s adjustment tools help you fine-tune the color grading for a polished look.
- Add Color Adjustments:
- Go to the Adjustments Tab.
- Adjust Brightness, Contrast, Saturation, and more.
- Match Colors Across Clips:
- Use Color Match to create a consistent look.
Shortcut: Use Ctrl + M to open the adjustment menu quickly.
7. Export Your Intro
- Check Playback:
- Play through your intro to ensure everything aligns with the beats.
- Export Settings:
- Resolution: 1080p or 4K (for high-quality visuals).
- Frame Rate: 30fps or 60fps, depending on your footage.
- Export using Ctrl + E.
Keyboard Shortcuts for CapCut Actions
Here are some essential shortcuts to speed up your editing workflow:
| Action | Shortcut |
|---|---|
| Split Clip | Ctrl + K |
| Undo | Ctrl + Z |
| Redo | Ctrl + Y |
| Zoom Timeline | Shift + Mouse Wheel |
| Export | Ctrl + E |
| Add Transition | Ctrl + Shift + D |
| Copy Effect | Alt + Drag |
| Open Adjustments Menu | Ctrl + M |
Why CapCut is Perfect for Streamers/Content Creators
- Affordable: Pro version is only £7.99/month.
- AI Features: Beat detection, auto color adjustment, and more.
- Cross-Platform: Available for desktop and mobile, making it versatile.
- Fast Rendering: Optimised for quick exports without taxing your system.
Final Thoughts
Creating a stream intro with CapCut is straightforward, even if you’re new to video editing. With its user-friendly interface, AI tools, and creative effects, you can produce high-quality intros that grab attention and make your stream stand out, remember streaming should be entertaining, it’s theatre at the end of the day!
If you found this guide helpful, please like and subscribe to my channel for more tutorials. Got questions or need advice? Join my Discord for tips and creative support.
What will your next stream intro look like? Let me know in the comments!
Keywords: CapCut stream intro tutorial, create stream intro, video editing for streamers, CapCut shortcuts, stream starting intro, CapCut effects, CapCut transitions, stream intro 2024