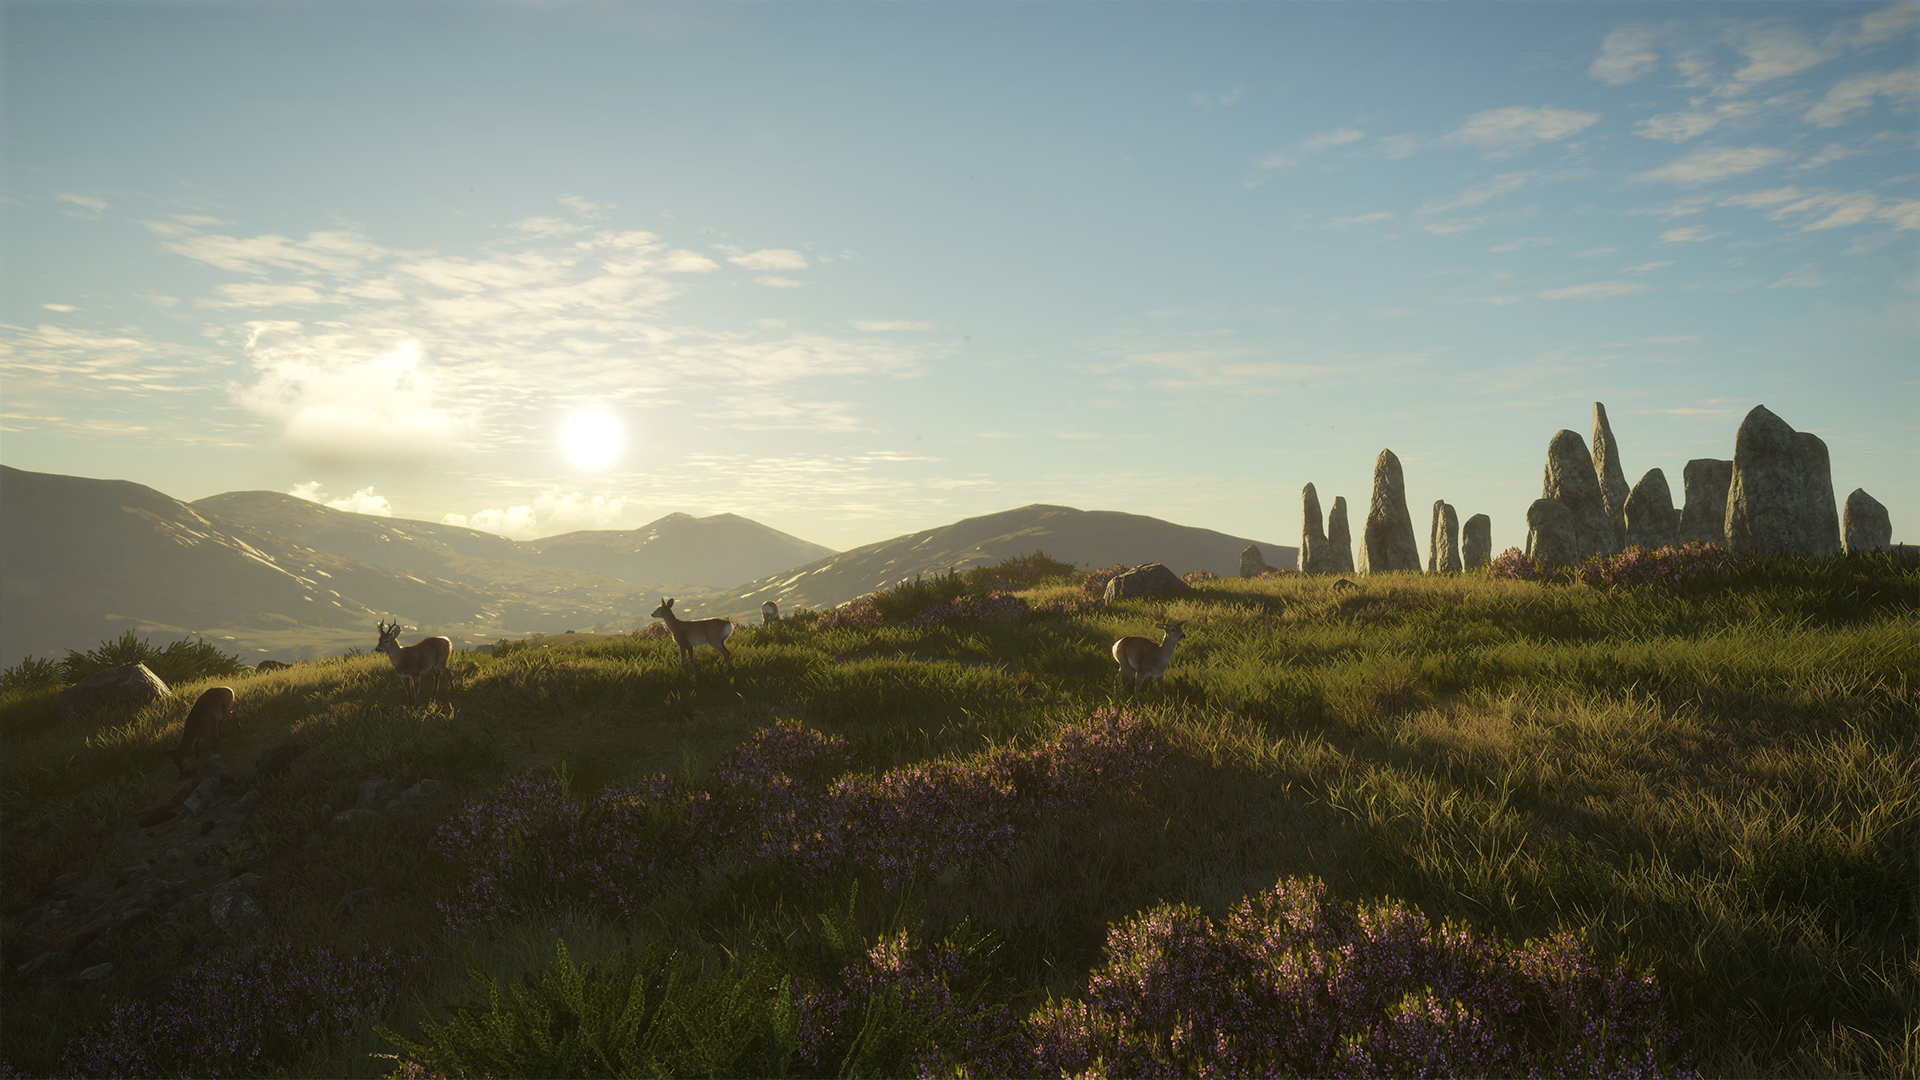
If you’ve ever gone after a Great One in theHunter: Call of the Wild, you’ll know straight away… roe deer are a different beast.
This is easily one of the harder grinds in the game. Not because they’re rare, but because of how they behave, how they spawn, and how easy it is to mess it up without even realising.
So here’s everything you actually need to know, without the waffle.
First, Know What You’re Dealing With
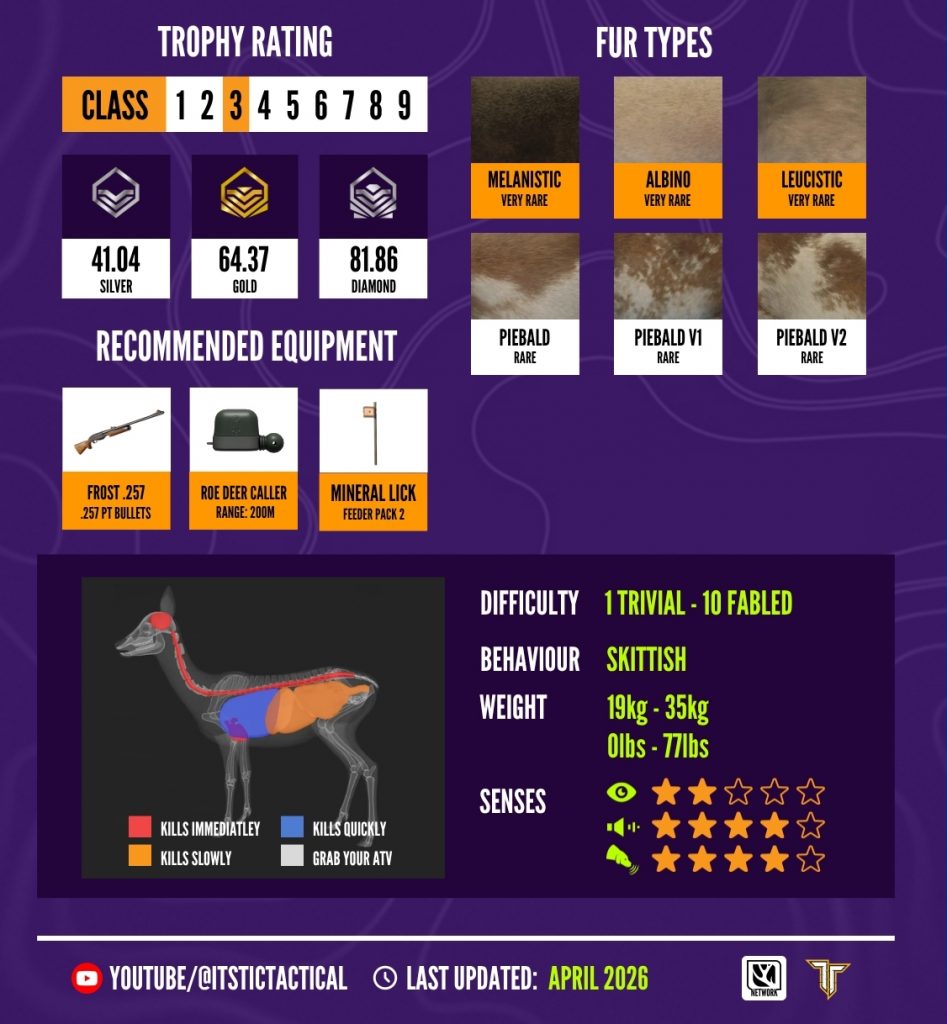
Roe deer are Class 3.
- Difficulty level: Level 1 (Trivial) – Level 10 (Fabled)
- Diamond score: 81.86
- Weight: 19–35kg
- Drink time: 14:00 – 17:00
The Big One: How Respawns Actually Work
This is where most people go wrong.
Roe deer use pair respawns.
Most zones are:
- 1 male
- 1 female
If you only shoot the male… you’re slowing yourself down.
You need to kill both to force a proper respawn.
Before You Even Start Grinding
Don’t skip this.
Go and find every drink zone on your map first.
If you don’t:
- Respawns will jump to places you haven’t found
- Your rotations will fall apart
- You’ll think your game is broken
It isn’t. You just missed zones.
Fixing Bad Zones (This Is Huge)
Some zones are dead weight, like solo females in good spots.
You want:
- Pairs
- Or solo males
So here’s what you do:
- Shoot the female in a main zone
- Leave the body there
- Go somewhere else
- Kill a male or a pair
- Don’t claim anything
- Back out to main menu
This forces the game to reshuffle that zone.
It’s a bit of a workaround, but it works.
Herd Management (HM) — Keep It Simple
You’ve probably heard this thrown around a lot.
Here’s what it actually means in practice:
- Shoot Level 2 and Level 3 males
- Leave tiny Level 1 males in bad zones
Why?
Because the game tries to balance things out.
So if all your bad herds are full of tiny males, the game starts pushing better spawns into your main zones.
That’s how you stack diamonds… and eventually hit a Great One.
The Air Rifle Trick (Vasquez Cyclone)
This is one of the easiest ways to make roe deer grinding less painful.
If a deer is 100m+ away, you can:
- Tap it with a Air Rifle pellet
- Its pair goes alert, not spooked
- It stands still, allowing you to take it without it fleeing
Free shot.
It saves time, especially on awkward angles or open maps.
Loadout (What Actually Works)
Keep it simple:
- .243 / .257 / .256 → your main rifles
- .300 → for clearing stuff quickly if needed
And most important:
👉 Place tents at least 250m away
Any closer and you’ll spook the entire zone when you fast travel.
Best Maps for Roe Deer Grinding
Not all maps are equal. Some make this grind way easier.
1. Tòrr Nan Sìthean (Scotland)
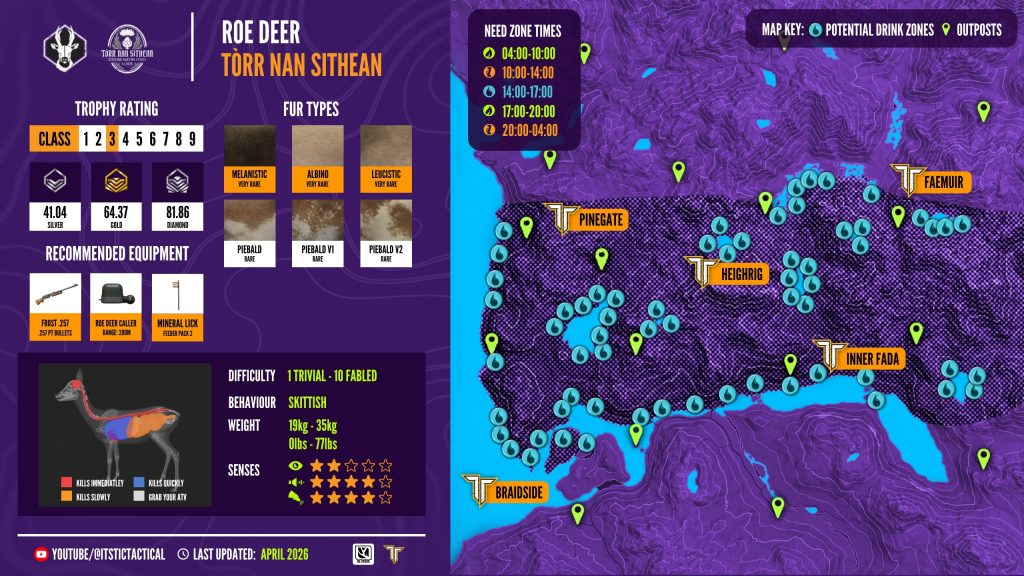
This is a favourite right now and for good reason.
Where to focus:
- The big lake on the right side
- The bottom of the river coast
Why it’s good:
- Very consistent respawns
- Some proper “trap” zones where deer keep coming back
Downsides:
- Terrain can be rough
- Some zones sit on that central island… which is a pain
Use a mix of Mineral Lick feeders and Drink zones.
2. Cuatro Colinas
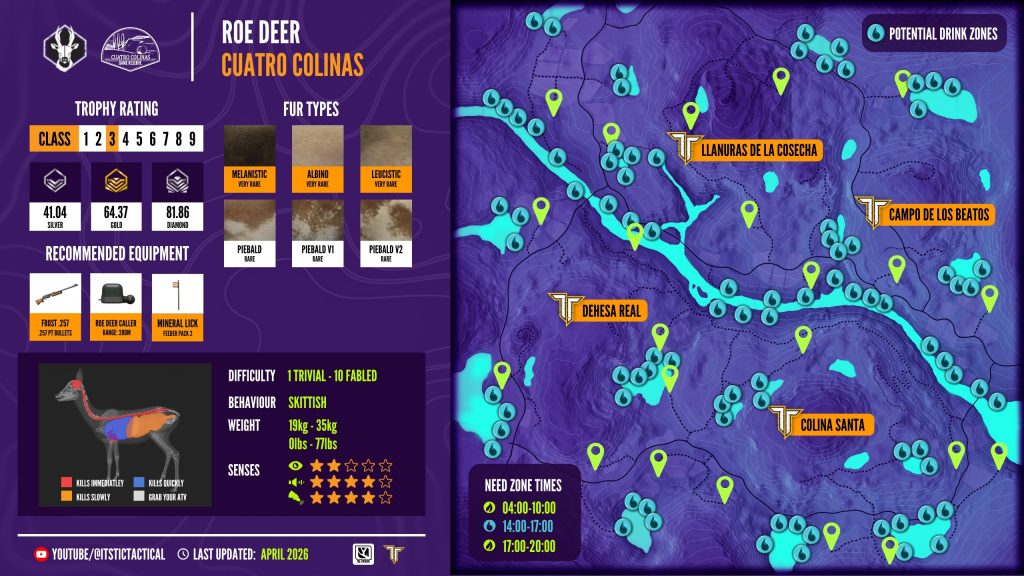
If you want efficiency, this is probably the best map.
Key spot:
- The bottom left lakes, easily 20+ males per run
Why it’s good:
- Open terrain = easy spotting
- Strong respawn traps
- Fast rotations
Downsides:
- Loads of zones to manage
Supplement drink zones with feeders where it’s awkward to set up.
3. Hirschfelden
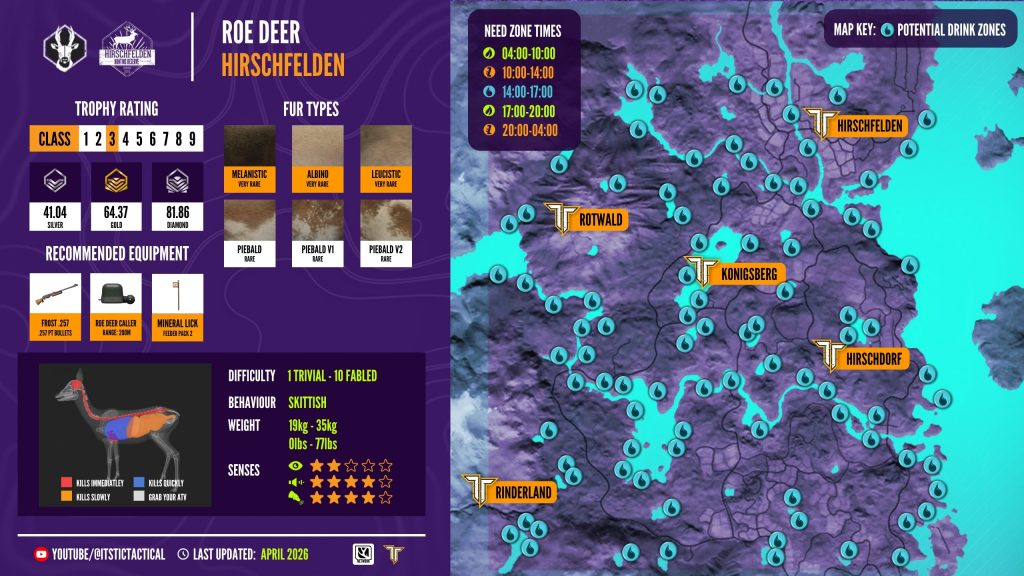
Looks great… but not ideal for grinding.
Why people still use it:
- It’s the original roe deer map
- Great beginner map
The problem:
- Zones are everywhere
- No reliable respawn traps
- Dense trees slow everything down
Basically, anywhere on this map that’s wet, there is probably a Roe Deer nearby! Best to avoid.
Final Thoughts
This grind isn’t about luck.
It’s about:
- Controlling your zones
- Managing spawns properly
- Not cutting corners
Do it right, and you’ll start seeing diamonds stack up.
And once that starts happening…
You’re in Great One territory.
Subscribe over on Youtube for more tips!
https://www.youtube.com/@tictactical